G5668A, G7137A, G7167A, G7167B Multisampler Install the Sample Thermostat
Tools required
Qty. | p/n | Description | |
|---|---|---|---|
1 |  | 5182-3466 | Torx screwdriver T10 (for the Sample Thermostat) OR |
1 | | 5023-3089 | Torx key set (part of the G7120-68708 InfinityLab LC Series Tool Kit) |
Parts required
Qty. | p/n | Description | |
|---|---|---|---|
1 |
|
| Sampler |
1 | | G7167-60201 | Sample Thermostat |
1 |
|
| Power cord |
1 | | 5067-6208 | Condensate Drainage Kit |
Prerequisites
|
NOTE
Visit https://www.agilent.com/ for a video tutorial on installing the Agilent InfinityLab Sample Thermostat. Find the video by the following options:
Enter the link https://www.agilent.com/search/?Ntt=install-infinitylab-sample-thermostat.
Alternatively, the video is available on the landing page of any compatible sampler under the section Videos.
WARNING
Flammable refrigerant
Formation of flammable gas-air mixtures inside the Sample Thermostat and laboratory.
- Keep open fire or sources of ignition away from the device.
- Ensure a room size of 4 m3 (1 m3 for every 8 g of R600a refrigerant inside of the Sample Thermostat).
- Ensure adequate ventilation: typical air exchange of 25 m3/h per m² of laboratory floor area.
- Keep all ventilation openings in the enclosure clear of obstructions. Do not block the openings on the circumference of the Sample Thermostat.
WARNING
Flammable refrigerant used
- When handling, installing and operating the Sample Thermostat, care should be taken to avoid damage to the refrigerant tubing or any part of the Sample Thermostat.
WARNING
In the event of a damage
- Keep open fire or sources of ignition away from the device.
- Ventilate the room for several minutes.
- Do not use the Sample Thermostat any more.
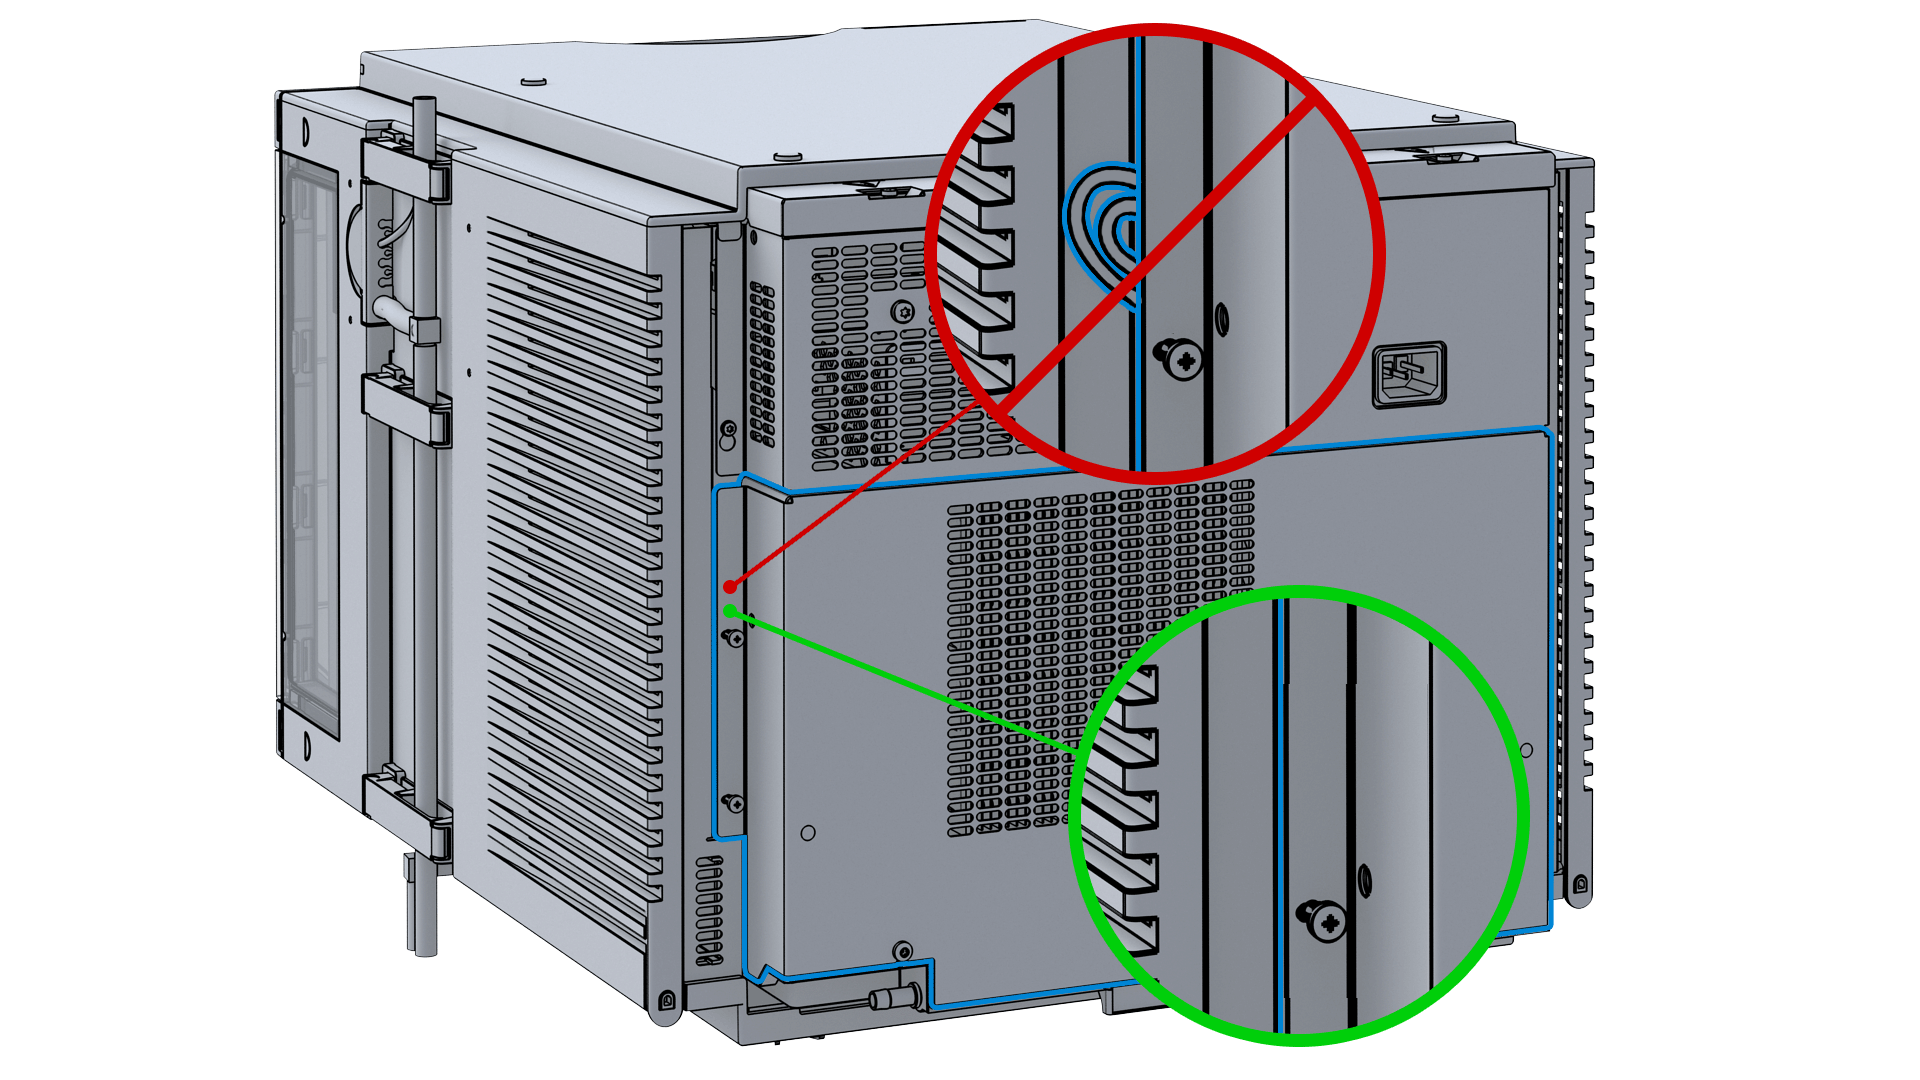
CAUTION
Routing of the condensation tubing
Proper routing of the condensation tubing is critical for correct condensate drainage.
- Do not place the sampler directly on the bench.
CAUTION
Condensate inside the module
Damage to the electronics of the module
- After installation of the Sample Thermostat, wait at least 30 min before switching on the module.
- Make sure there is no condensate inside the module.
NOTE
If the Sample Thermostat is disconnected from the power supply, wait for at least five minutes before replugging and switching on the compressor again.
NOTE
Even under average humidity conditions, a significant amount of condensed water gathers every day. A suitable container must be provided and emptied regularly in order to avoid overflow.
NOTE
For best cooling performance of the thermostat, the 2H drawer must be installed in the lowest position. Use the dummy drawers (G4267-60024) if no full hotel configuration is needed.
NOTE
Depending on the ambient conditions in the lab, the amount of condensate can vary from 200 mL to 2 L per day. Do not fill waste containers for the condensate to the top. Regularly empty the waste container.
NOTE
The setup with the condensate collector funnel is suitable for bench installations only. For installations on an InfinityLab Laboratory Instrument Bench, use the alternative installation described in Installation of the Infinity II Cooler/Thermostat Condensate Drainage Tubing Kit Technical Note (G7167-CoolerCondensateDrainage-TechPu-en-SD-29000254.pdf, SD-29000254) . Enter the link https://www.agilent.com/search/?Ntt=Installation-of-the-Infinity-II-Cooler/Thermostat-Condensate-Drainage-Tubing-Kit-Technical-Note to locate the TechNote on https://www.agilent.com/.
-

-
-
Slide in halfway
-
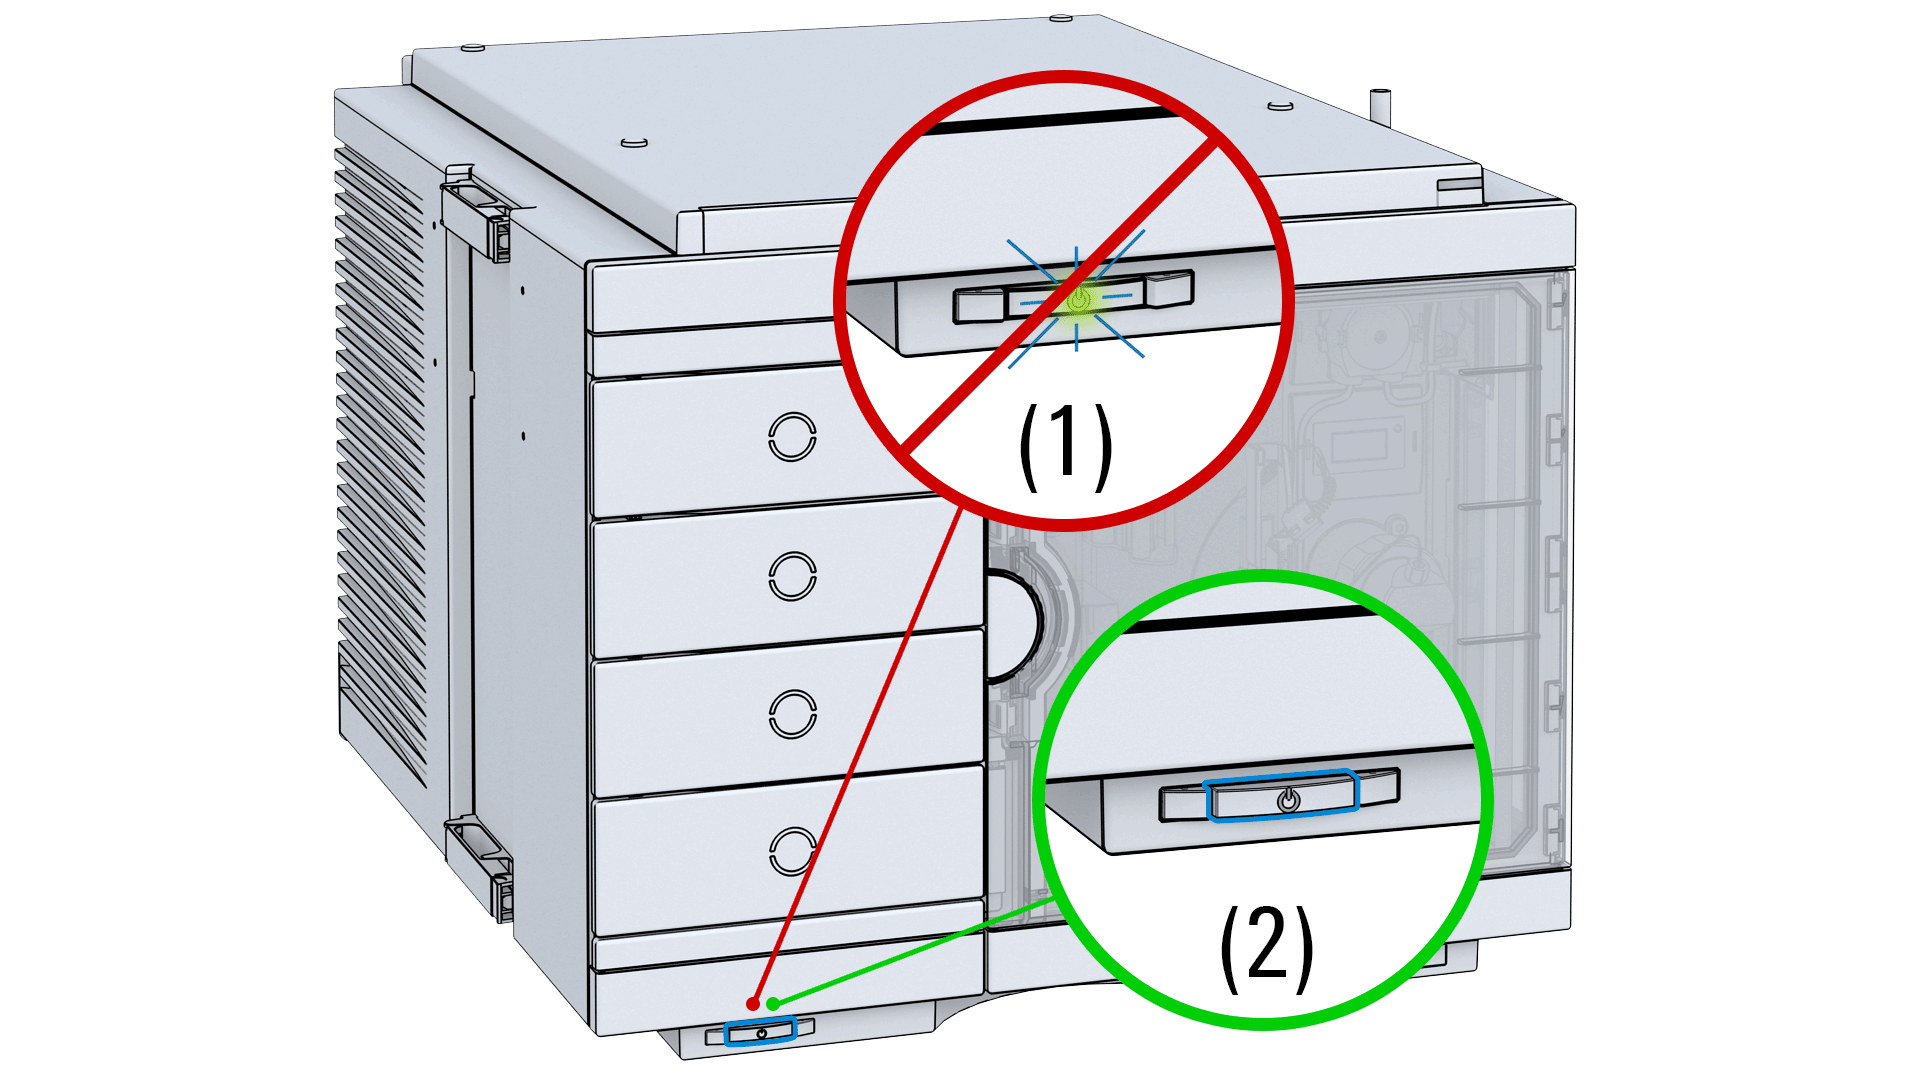
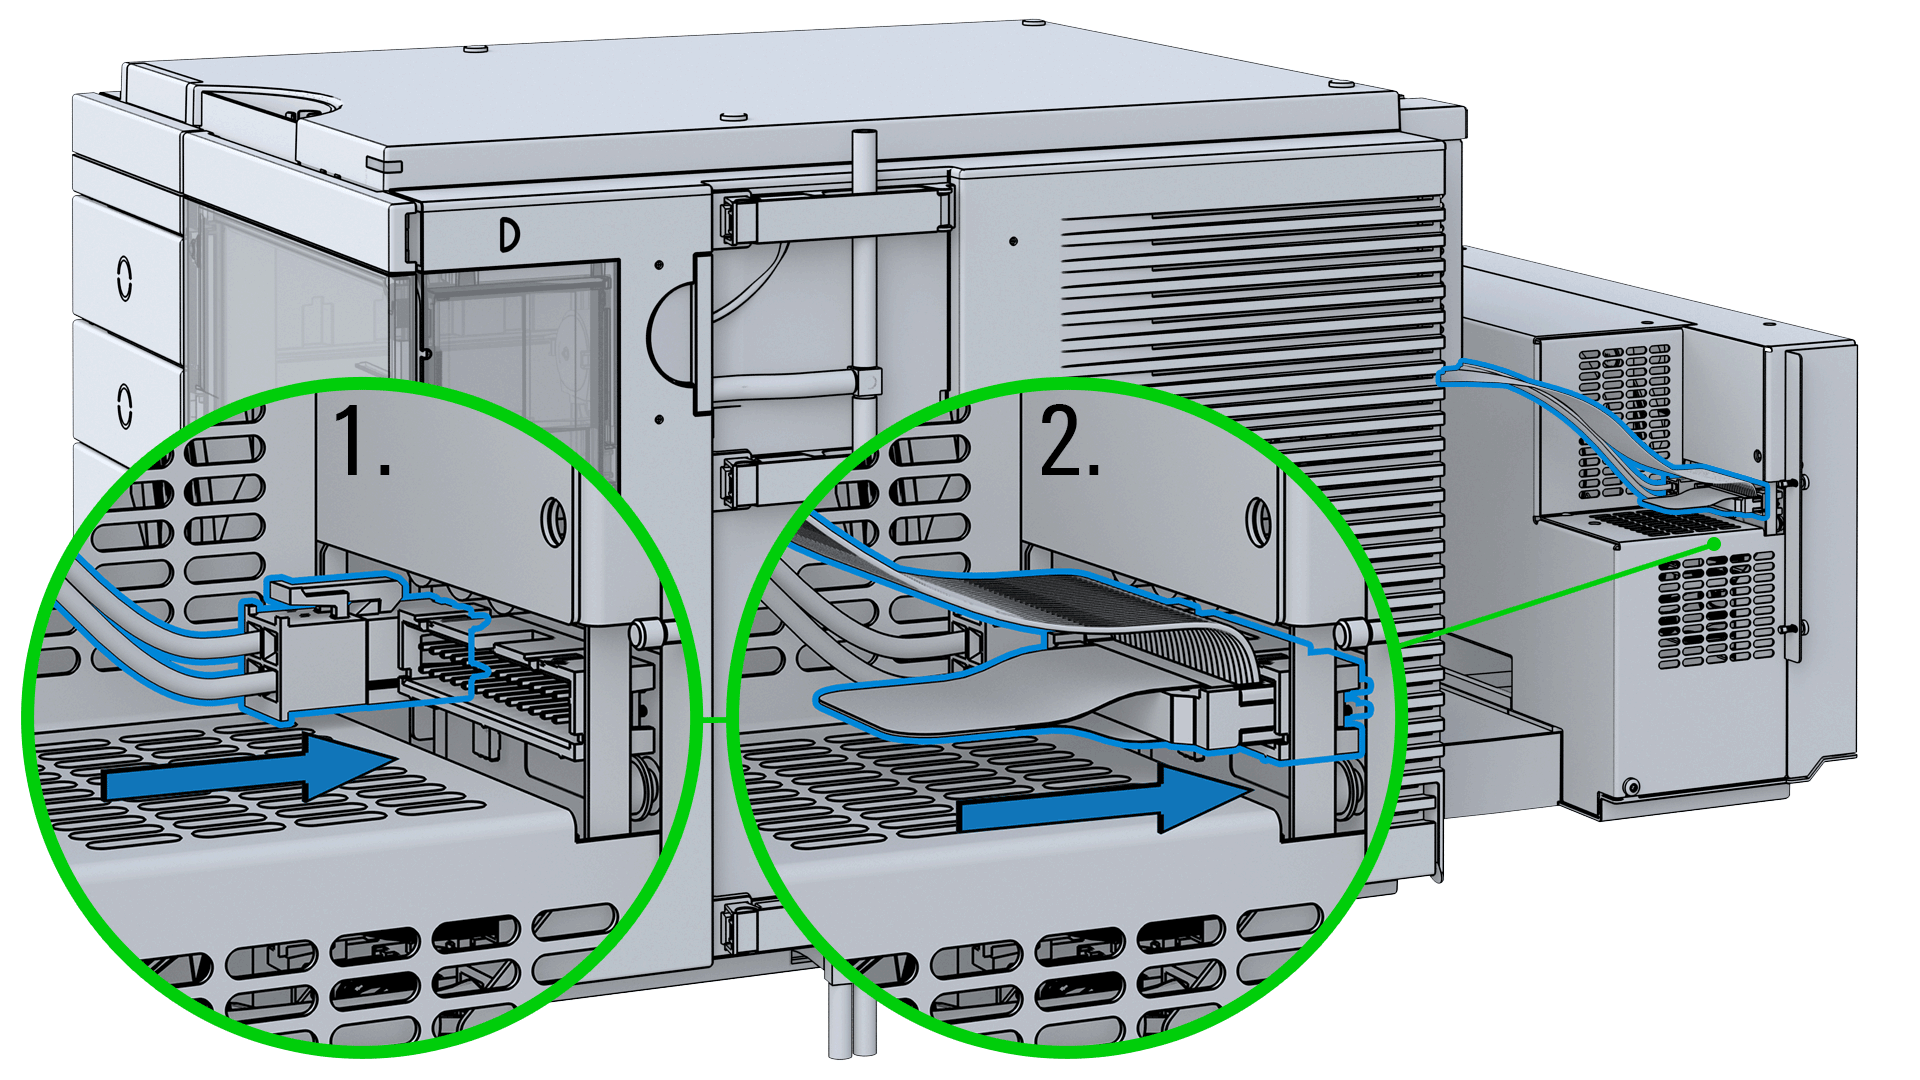
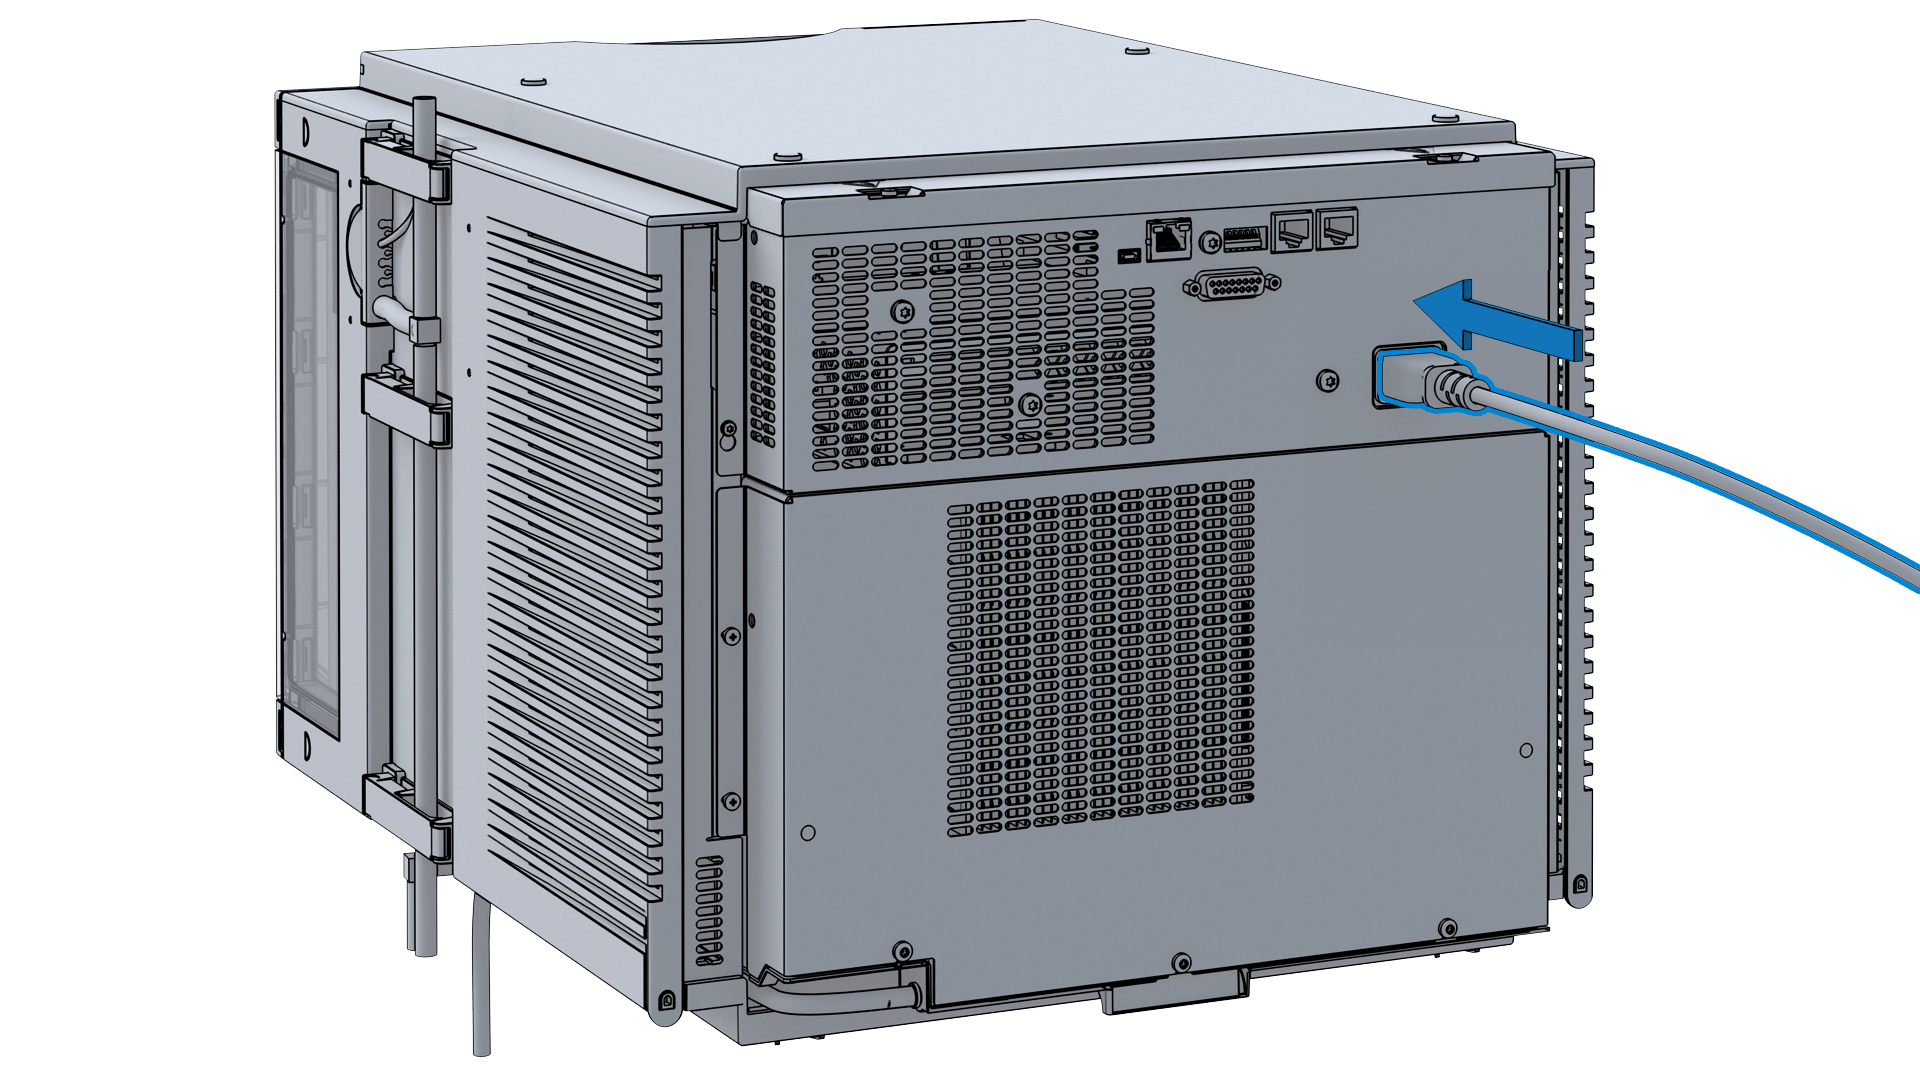
Make sure the power cable of the module is disconnected before connecting power and data cable of the Sample Cooler/Sampler Thermostat.
-
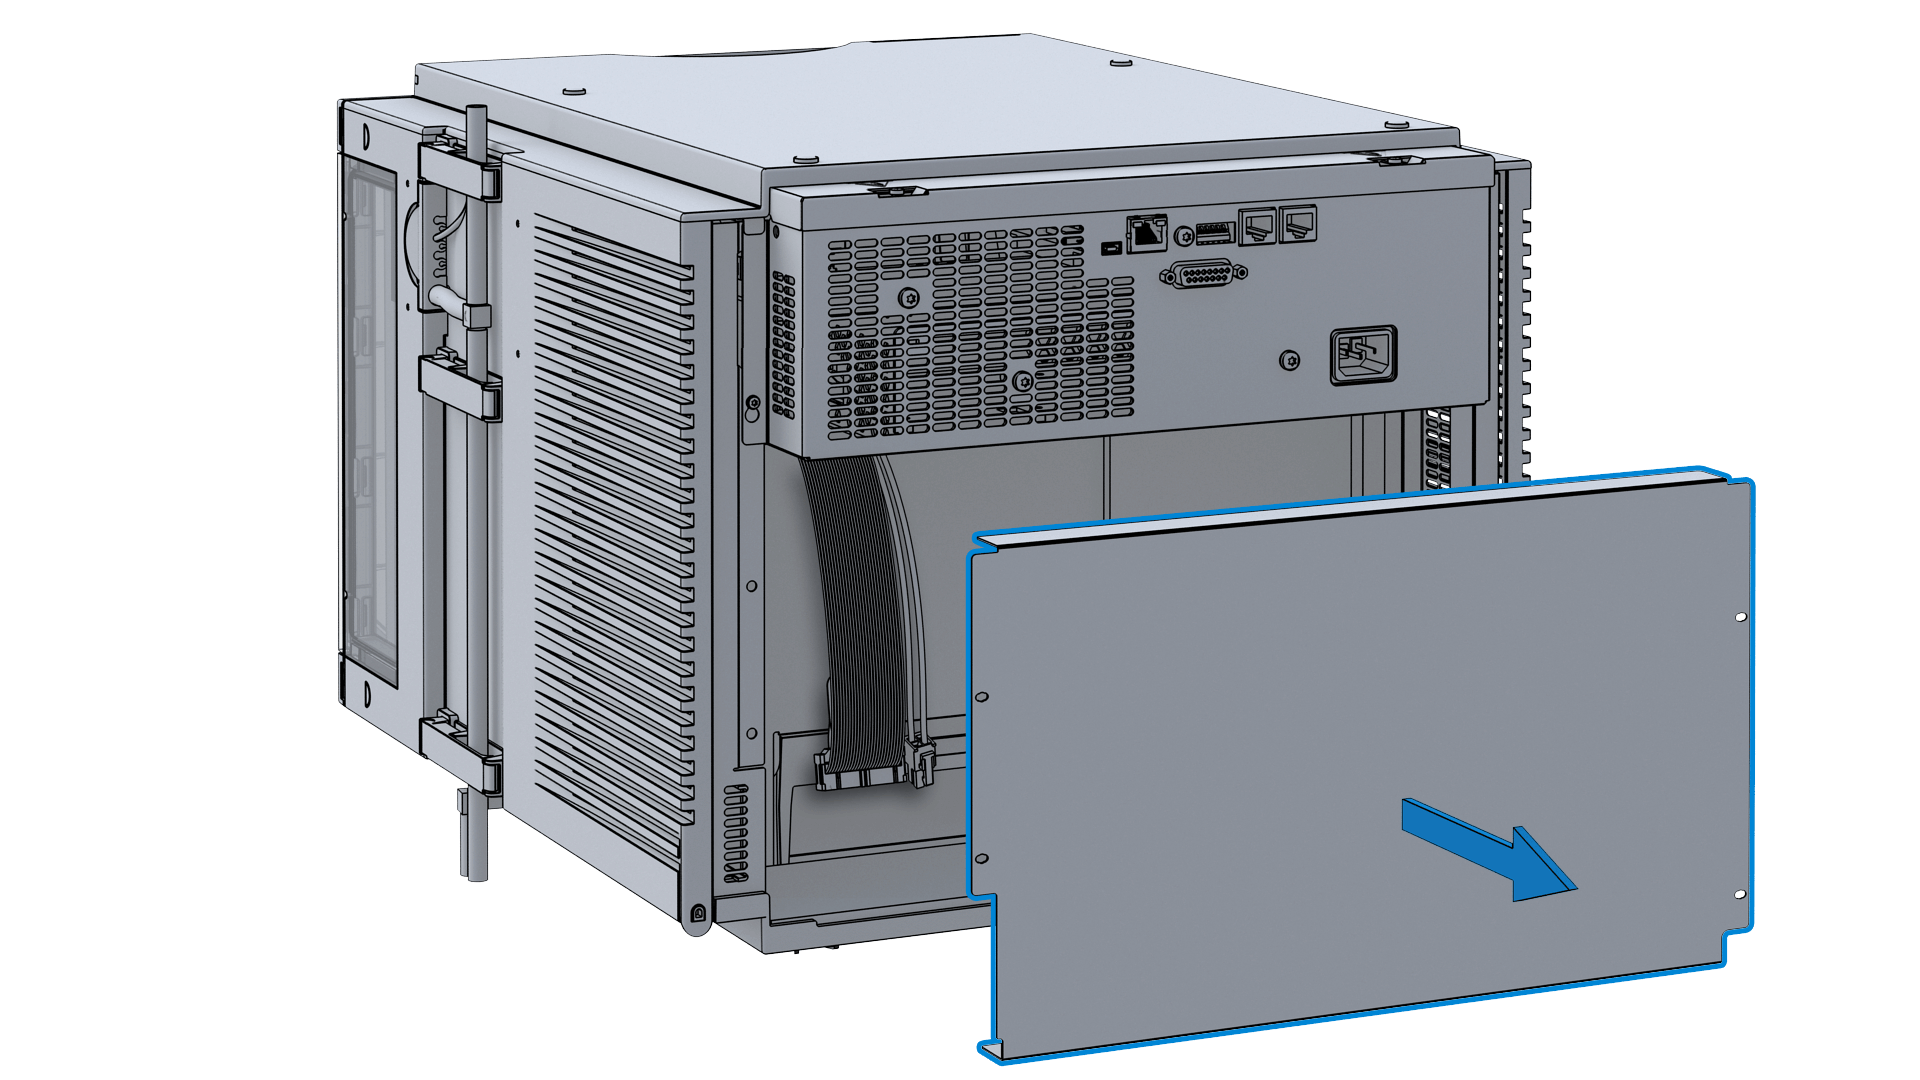
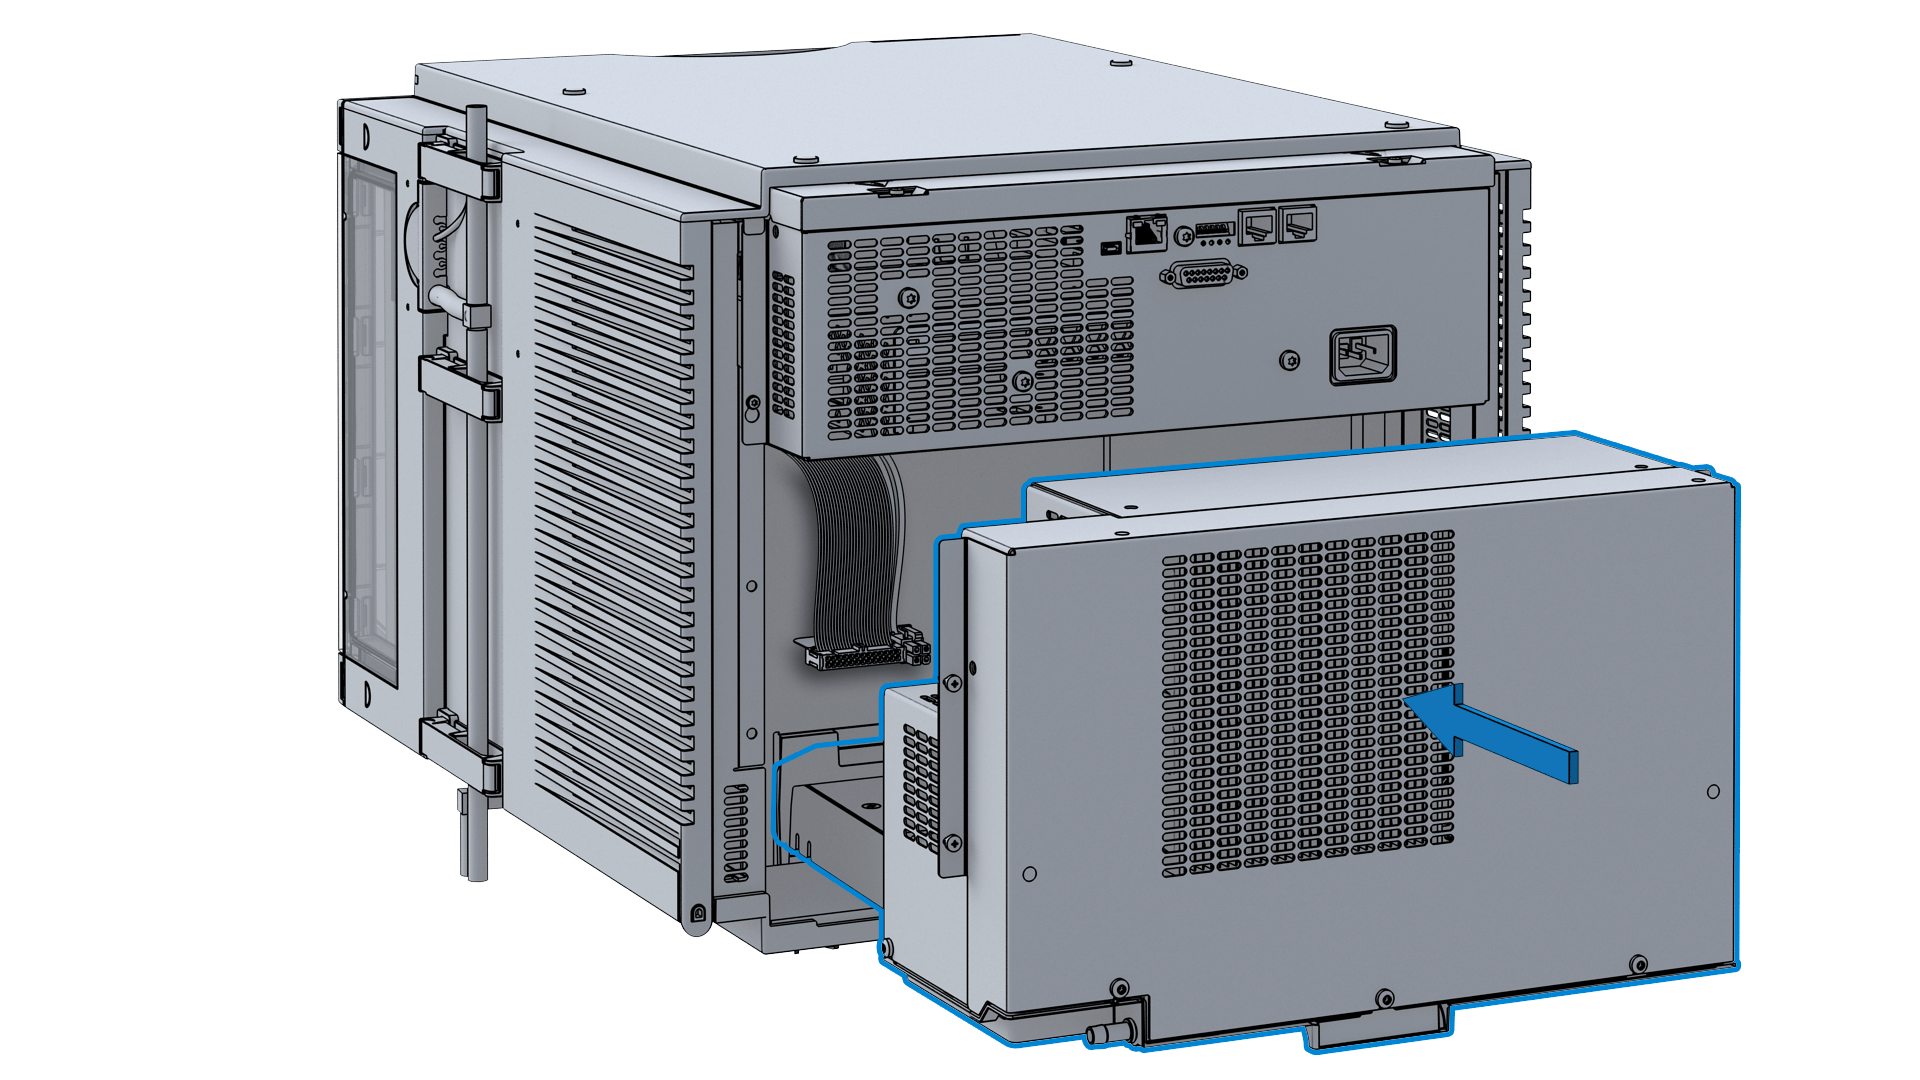
Damage to the cables. Do not bend or pinch the cables. Fit in the Sample Cooler/Sample Thermostat perfectly.
-
-
Use a bubble level to check the leveling of the sampler.
NOTE
To ensure adequate drainage for condensate, the module should be operated in a proper horizontal position.
-
-
Mount the drain connector on the condensate drainage outlet tube. Ensure the correct orientation of the spout.
-
-
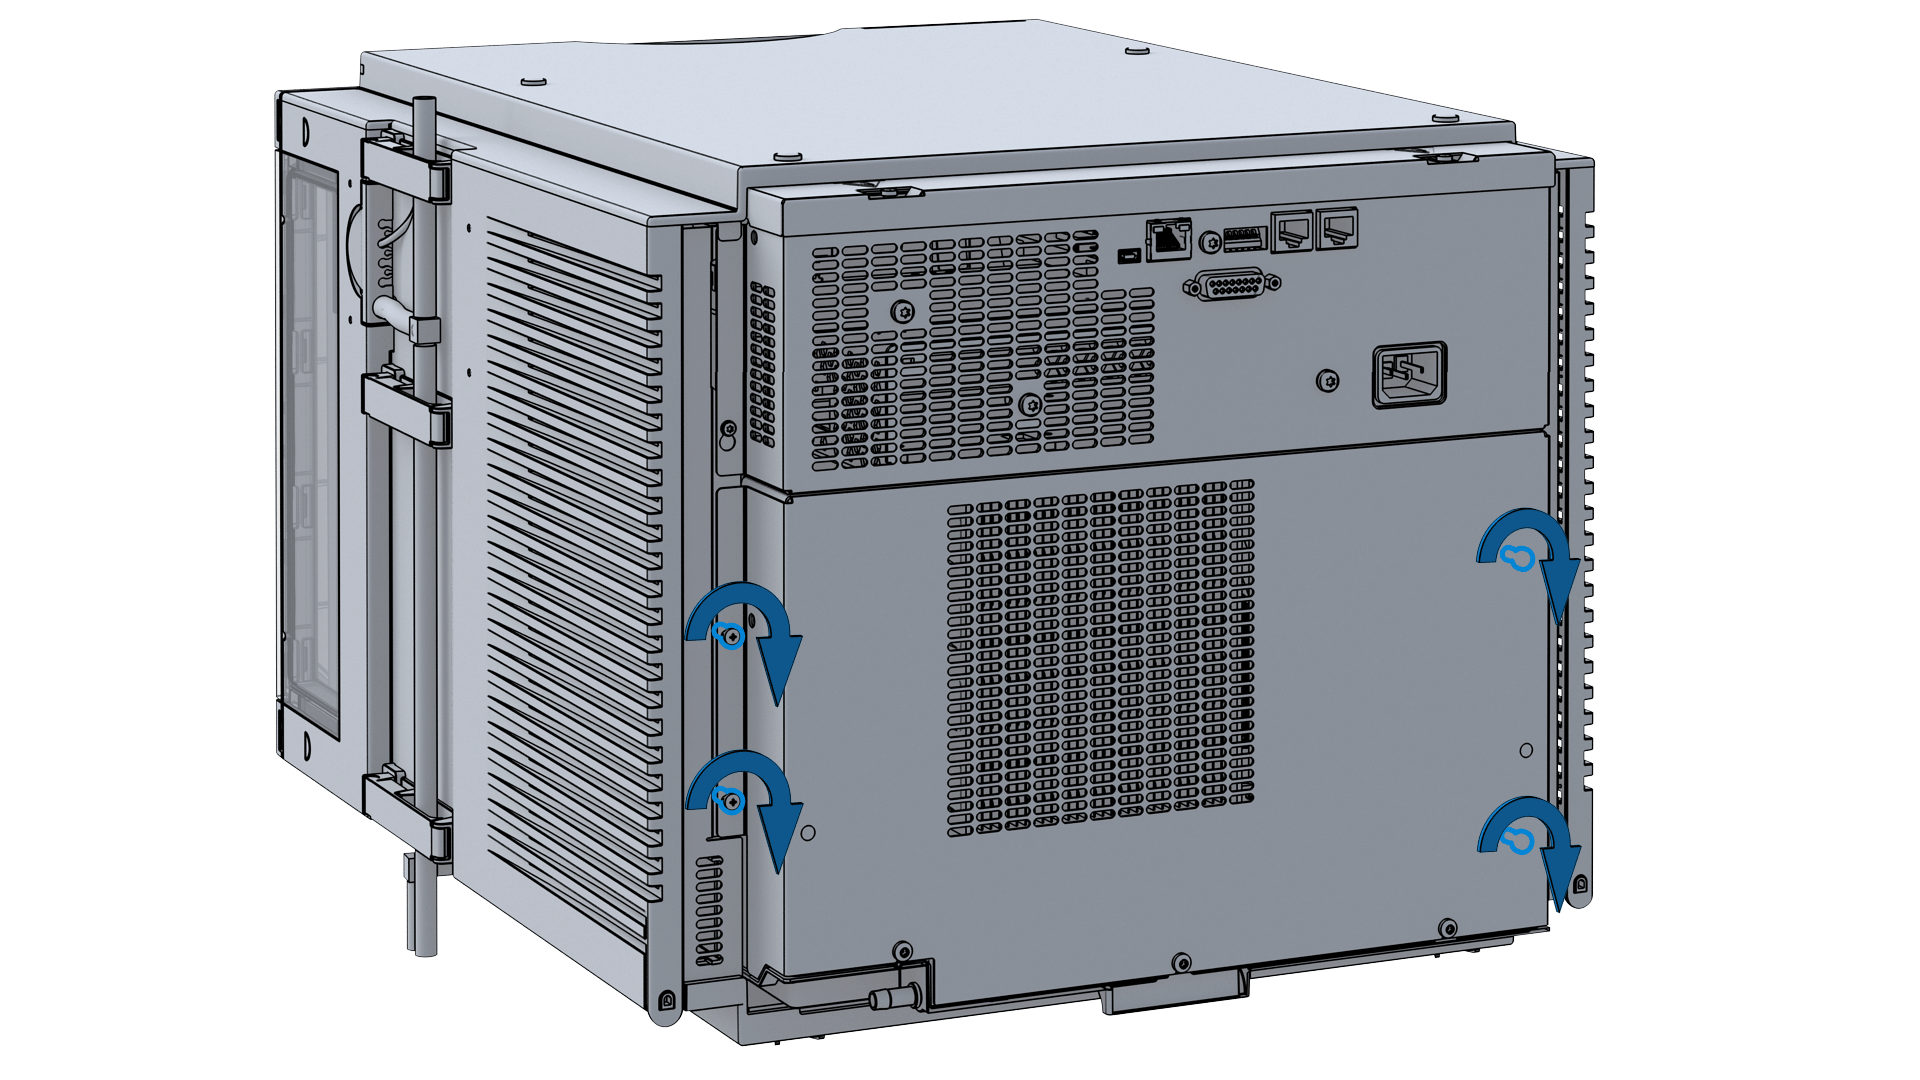
Place the washer over the thread of the screw (1). Screw the screw and washer halfway into the hole in the back of the cooler/thermostat (2).
-
Position the condensate collector funnel underneath the condensate drainage outlet tube (1) and fix it to the back of the cooler/thermostat by tightening the screw (2). Ensure correct orientation and avoid overtightening the screw.
-
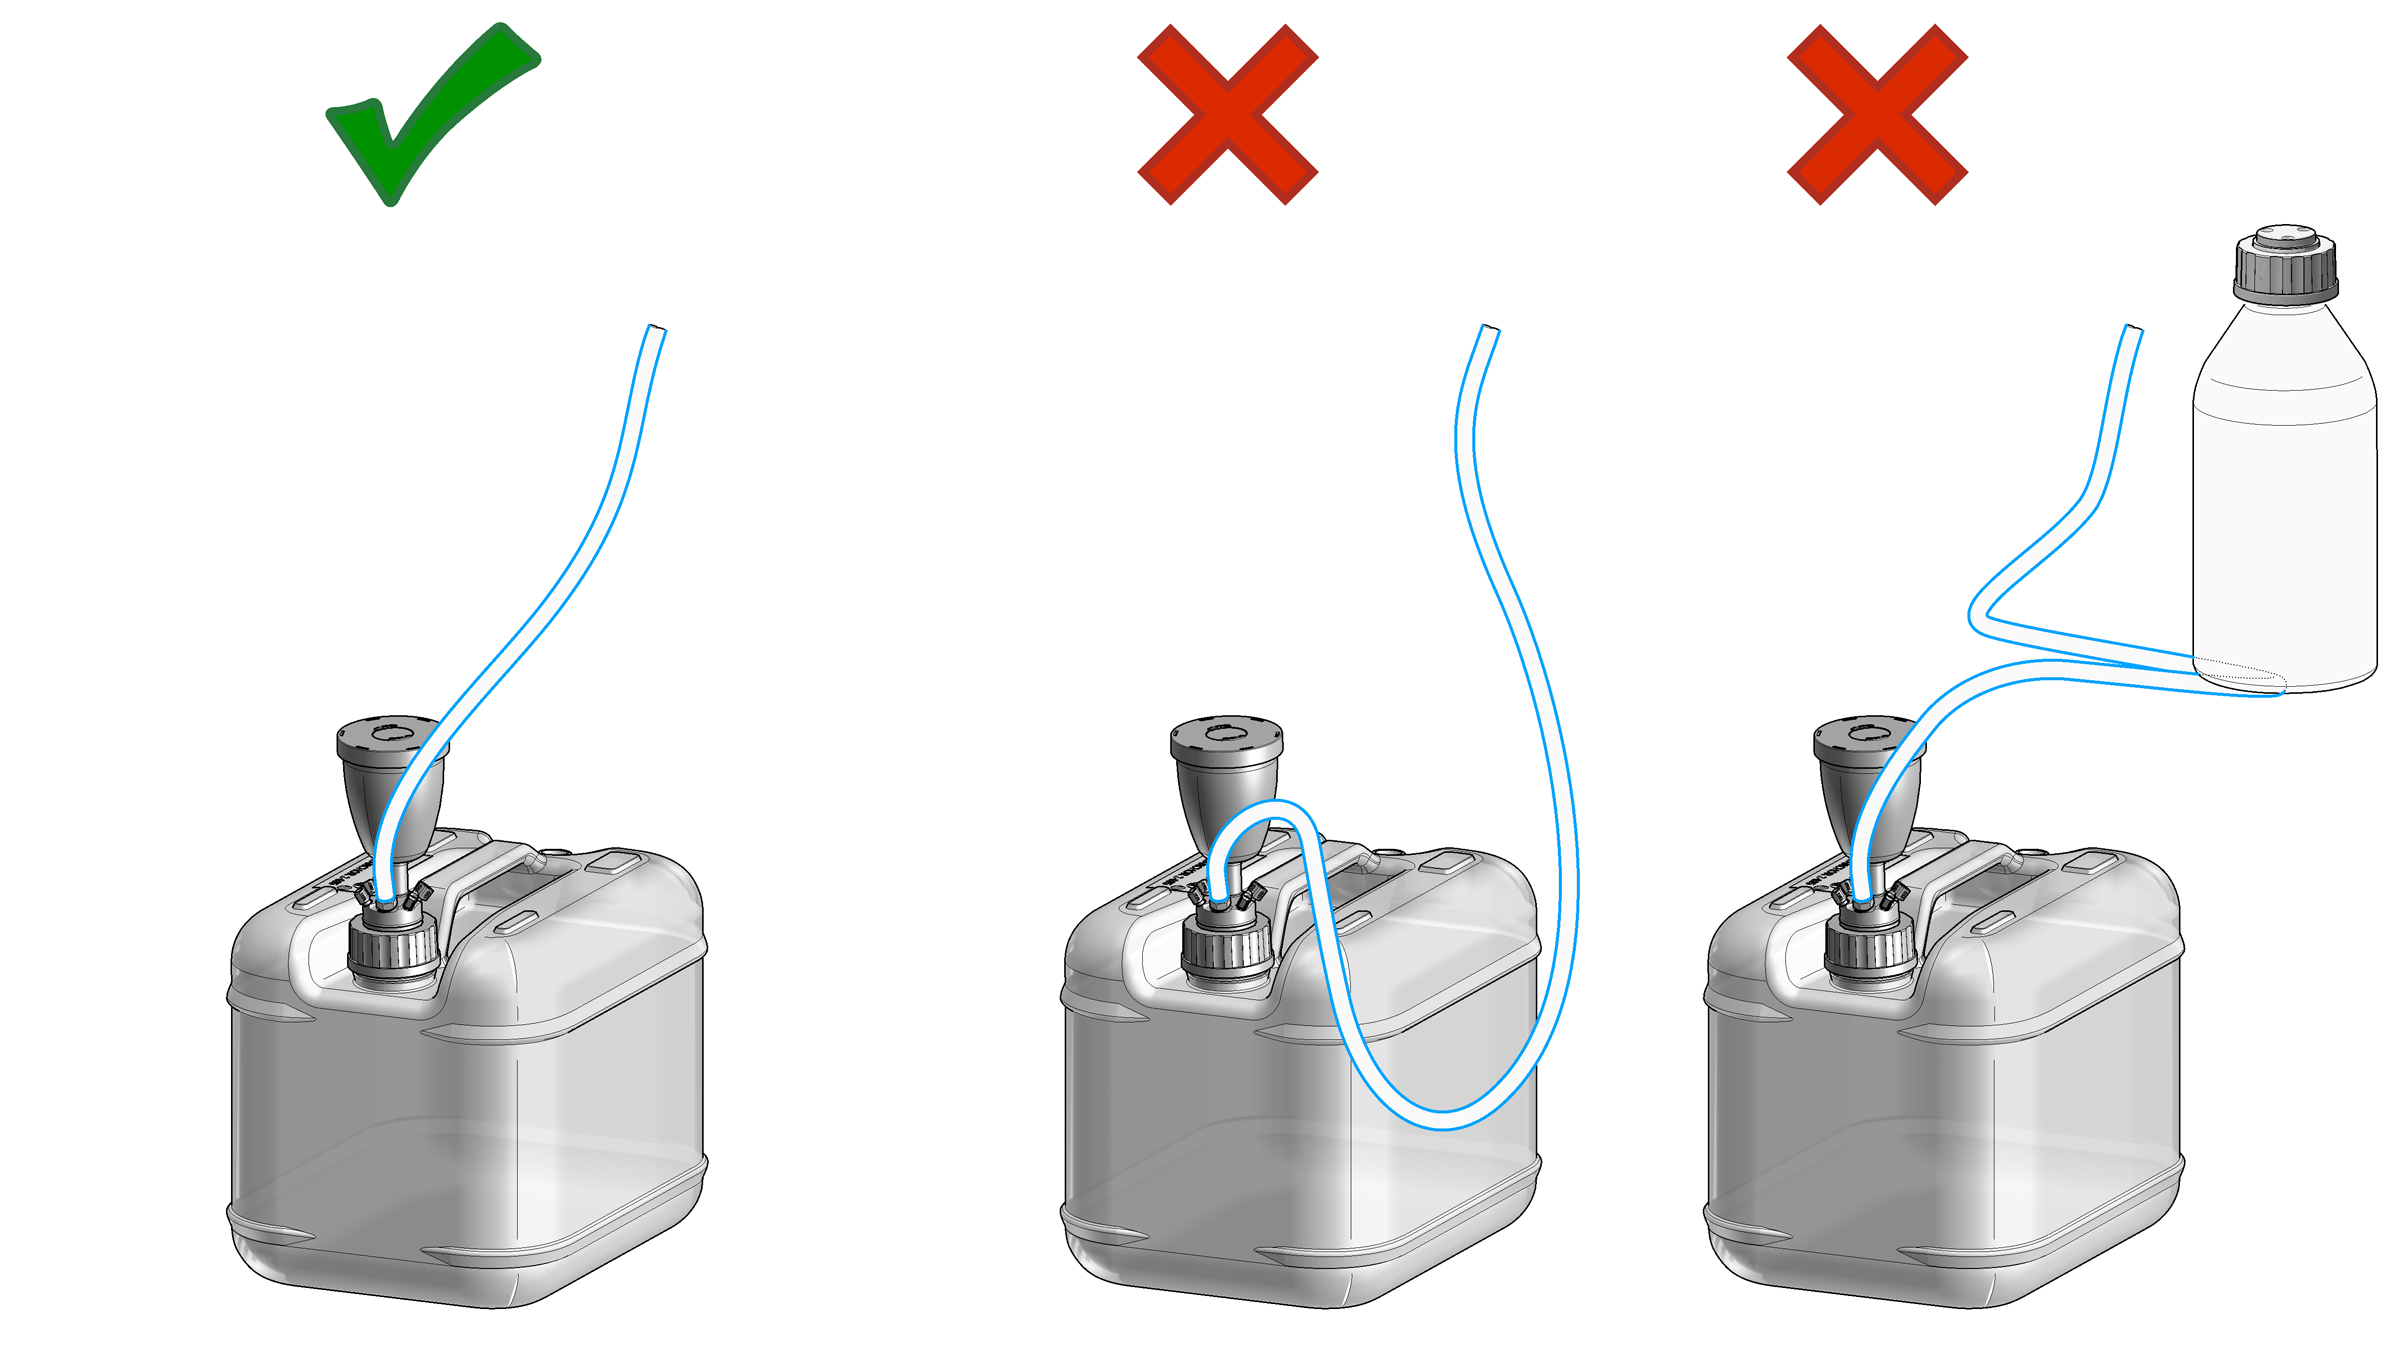
Shorten the condensate tube so that it runs straight into the waste container without any unnecessary detour (1). If needed, use the 90 ° tubing connector provided in the kit to eliminate uphill sections, which might occur at the edge of the bench (2). Agilent recommends the use of a separate canister for condensate collection to avoid drainage problems (3).
-
-
Configure the Sample Cooler or Thermostat in the CDS.
See Also
base-id: 3804121227
id: 72057597842049163