Replace Valve Heads of the G1170A Valve Drive
Several optional valve heads are available, which can be installed and exchanged easily.
| For bio-inert modules use bio-inert parts only! Do not mix with bio / biocompatible parts. |
| For biocompatible modules use bio / biocompatible parts only! Do not mix with bio-inert parts. |


Parts required
Qty. | p/n | Description | |
|---|---|---|---|
1 | 
|
| Agilent Quick Change Valve Head For details, see Valve Options Overview |
WARNING
Toxic, flammable and hazardous solvents, samples and reagents
The handling of solvents, samples and reagents can hold health and safety risks.
- Be sure that no solvent can drop out of the solvent connections when removing them from your valve head.
- When working with these substances observe appropriate safety procedures (for example by wearing goggles, safety gloves and protective clothing) as described in the material handling and safety data sheet supplied by the vendor, and follow good laboratory practice.
CAUTION
Valve Damage
Using a low pressure valve on the high pressure side can damage the valve.
- When using multiple column compartments as part of a method development solution, make sure that the high pressure valve head is connected to the autosampler and the low pressure valve head is connected to the detector.
CAUTION
Column Damage or Bias Measurement Results
Switching the valve to a wrong position can damage the column or bias measurement results.
- Fit the lobe to the groove to make sure the valve is switched to the correct position.
CAUTION
The valve actuator contains sensitive optical parts, which need to be protected from dust and other pollution. Pollution of these parts can impair the accurate selection of valve ports and therefore bias measurement results.
- Always install a valve head for operation and storage. For protecting the actuator, a dummy valve head (part of G1316-67001 (Transportation Lock Kit) ) can be used instead of a functional valve. Do not touch parts inside the actuator.
NOTE
For details, please refer to the Agilent InfinityLab LC Method Development Solutions User Guide (InfinityLab-Method-Development-Solution-UseMa-en-SD-29000211.pdf, SD-29000211).
NOTE
The tag reader reads the valve head properties from the valve head RFID tag during initialization of the module. Valve properties will not be updated, if the valve head is replaced while the module is on.
Selection of valve port positions can fail, if the instrument does not know the properties of the installed valve.
NOTE
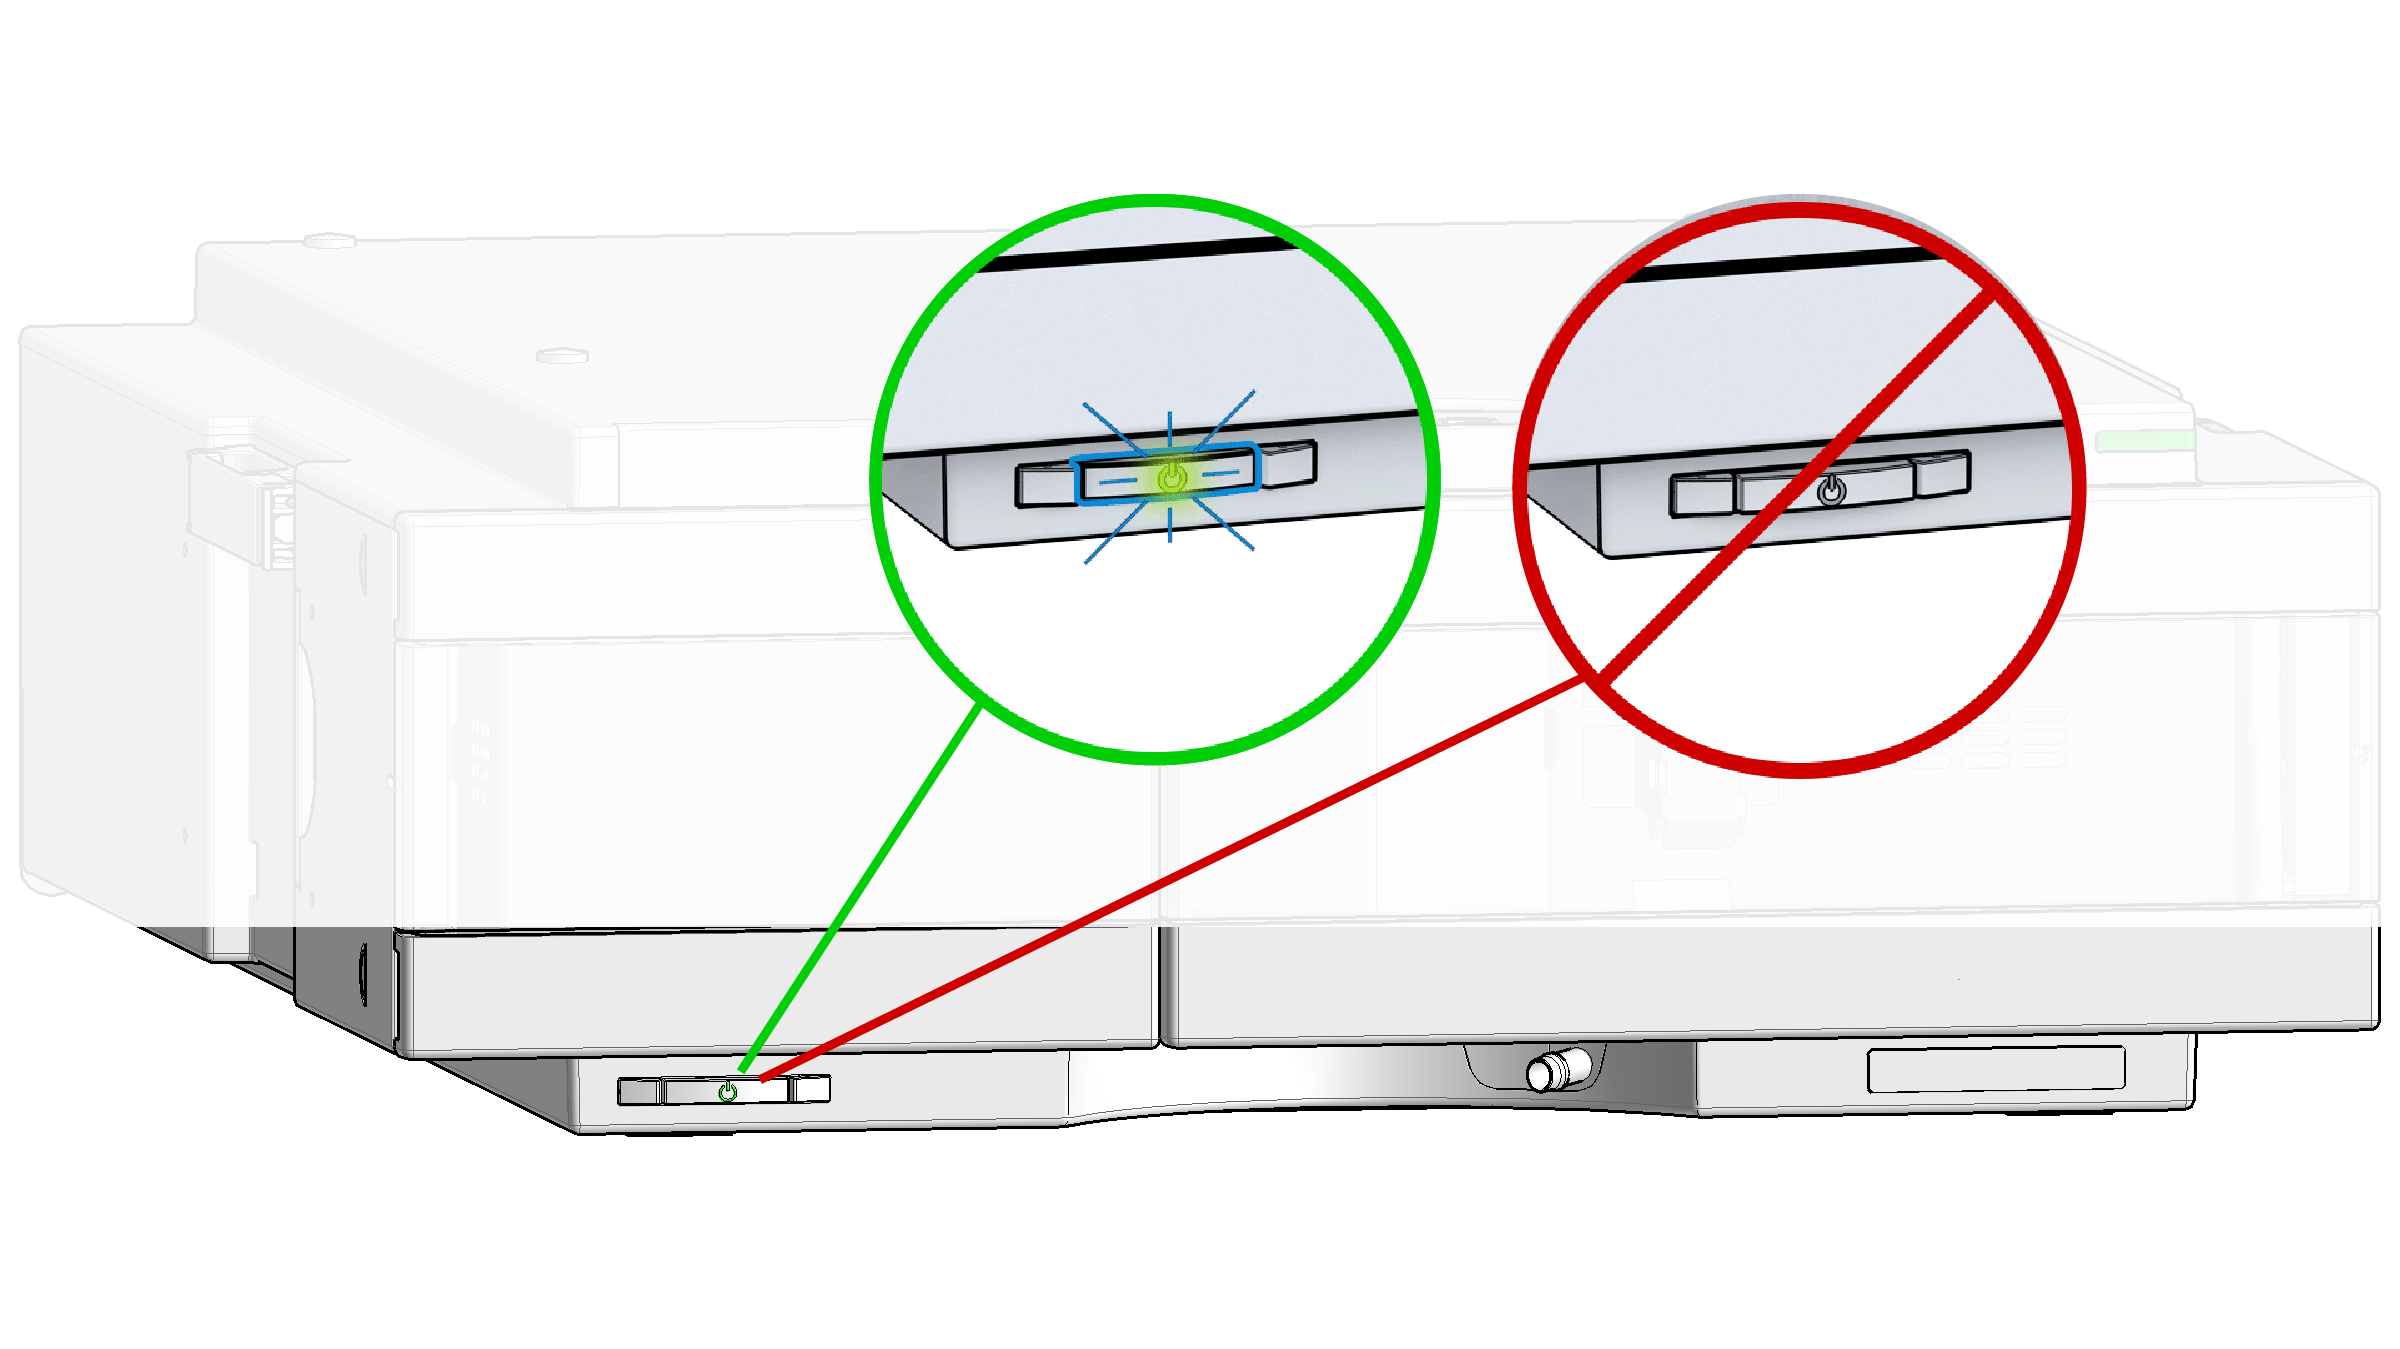
To have the valve correctly recognized by the valve drive you must have the valve drive powered off for at least 10 seconds.
-
Push the valve head for bringing it to its outer position (column compartment only).
-
Remove all capillary connections from the valve head.
Unscrew the nut and remove the valve head.
Put the new valve head onto the valve drive such that the lobe fits to the groove (see also G7116B_Installation of the Valve Heads).
Fasten the valve head onto the valve drive using the union nut (see also G7116B_Installation of the Valve Heads.
Install all required capillary connections to the valve head.
Push the valve head until it snaps in and stays in the rear position (column compartment only).
base-id: 3182156299
id: 27021600946379275