Exchange the Active Inlet Valve (AIV) or its Cartridge
When
|
Tools required
Qty. | p/n | Description | |
|---|---|---|---|
1 |  | 8710-1924 | Open-end wrench 14 mm |
Parts required
Qty. | p/n | Description | |
|---|---|---|---|
1 |  | G1312-60025 | Active inlet valve without cartridge |
1 |  | G1312-60020 | Cartridge for active inlet valve 600 bar |
Prerequisites
|
CAUTION
Ensure correct fit of the active inlet valve
Overtightening will destroy the active inlet valve cartridge.
- Tighten the active inlet valve properly.
-
-
Unplug the active inlet valve cable from the connector.
-
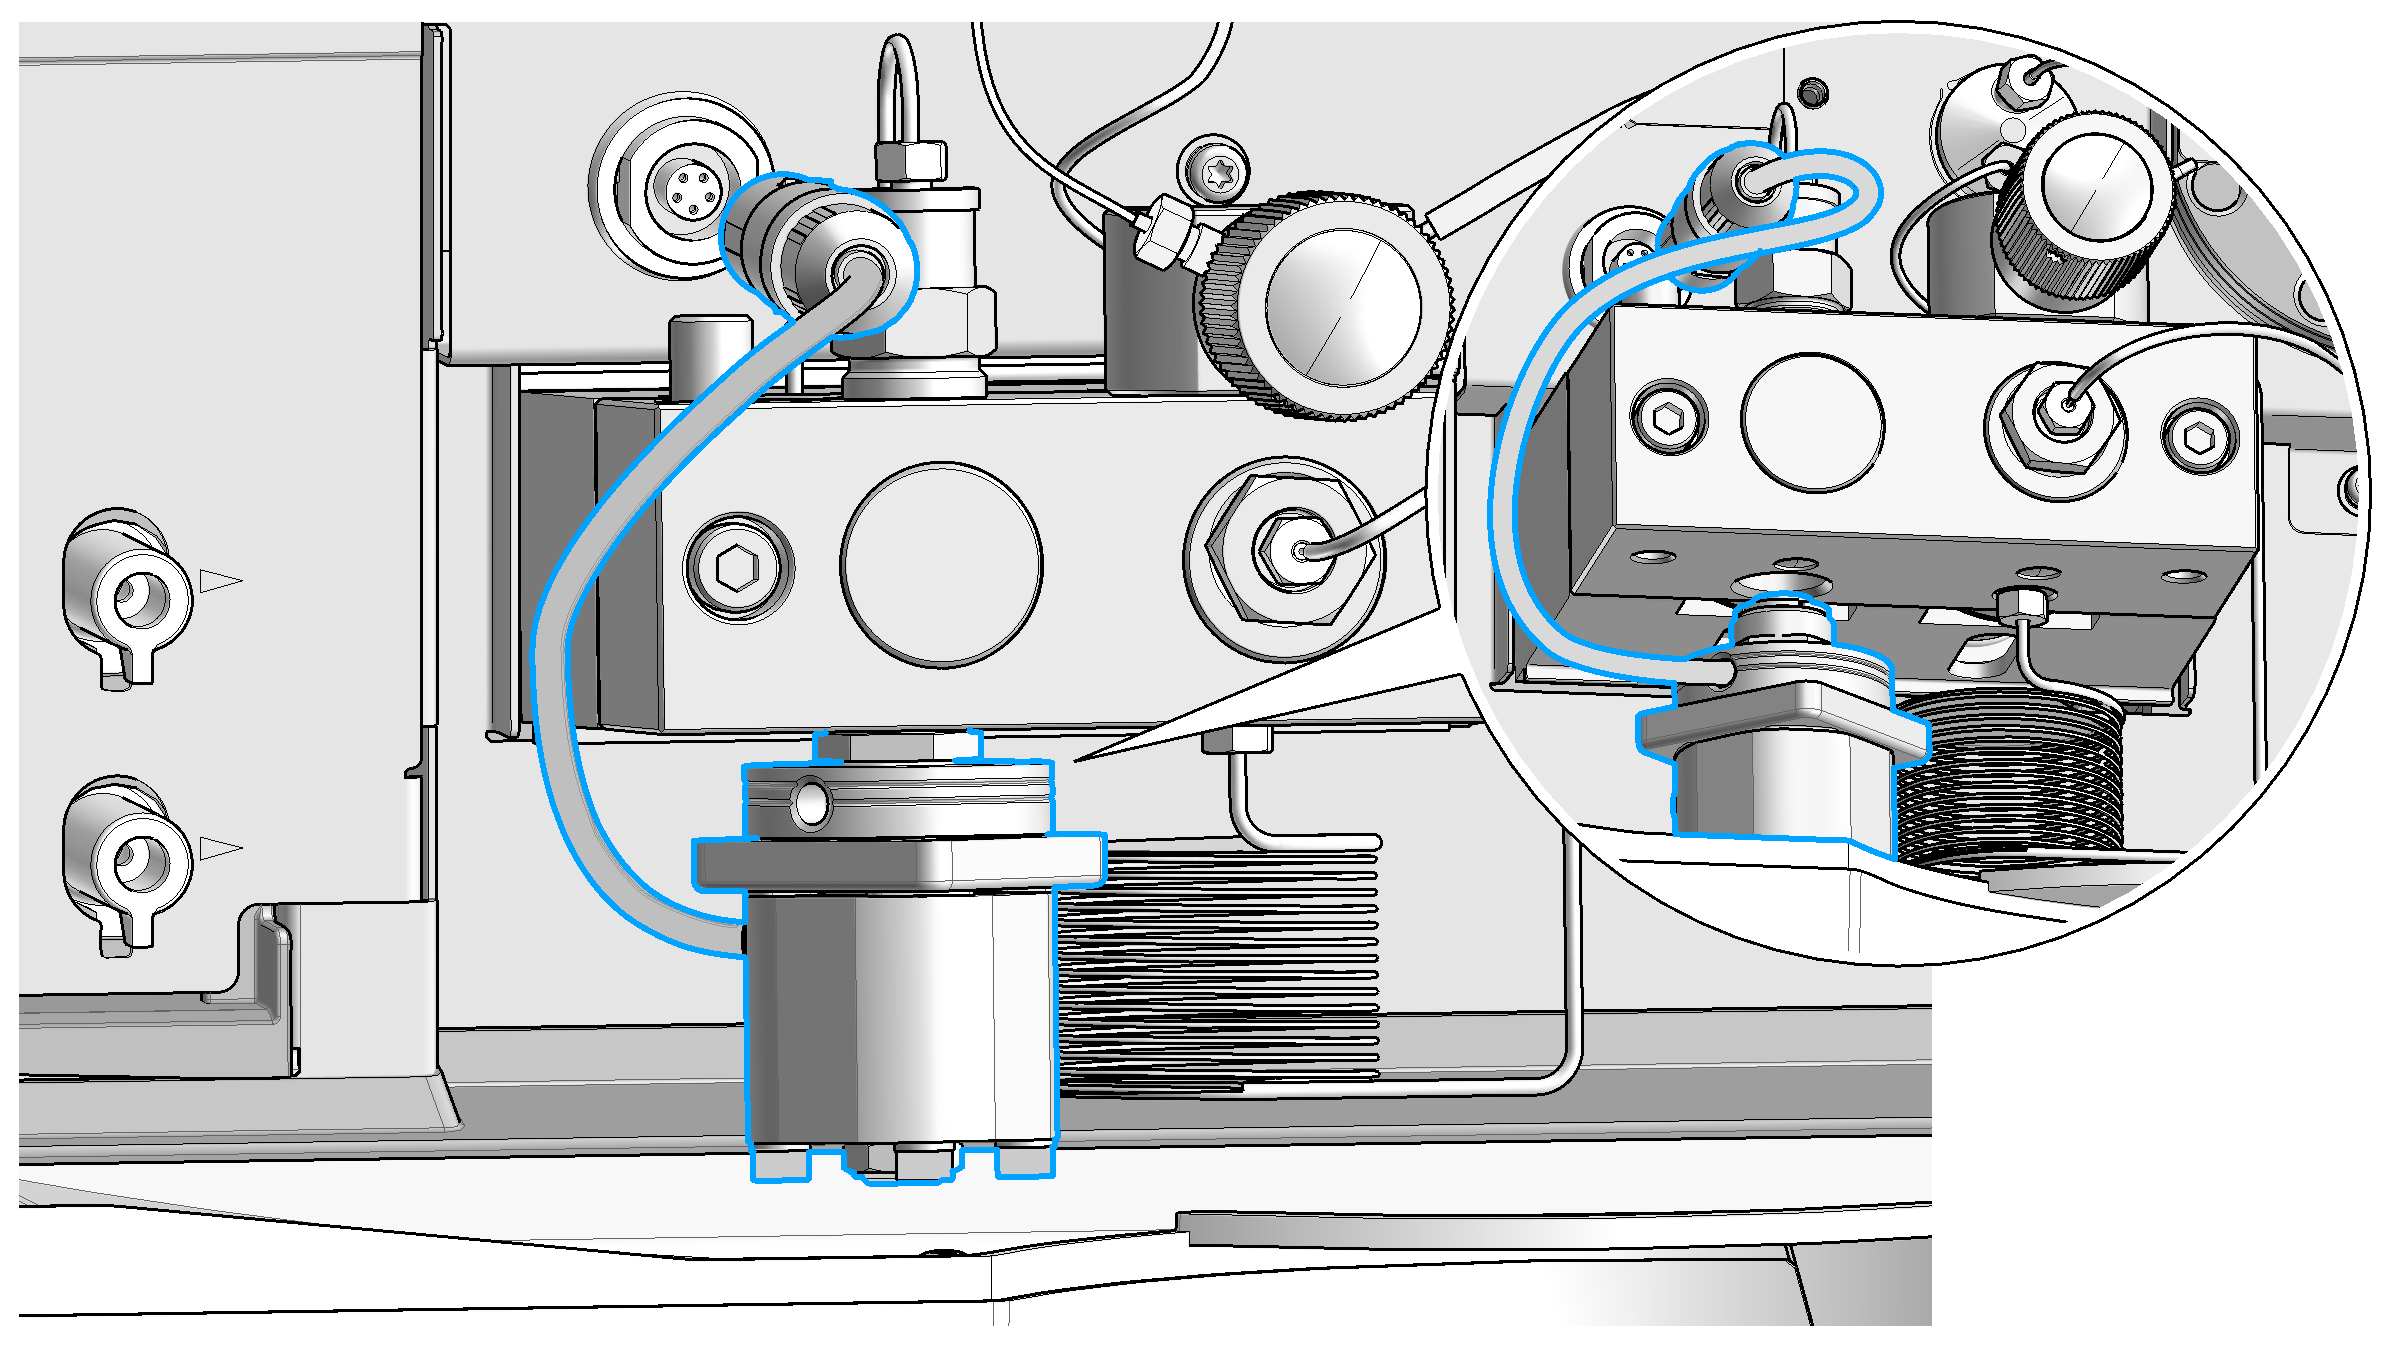
Disconnect the solvent inlet tube at the active inlet valve (beware of leaking solvents).
-
Using a 14 mm wrench, loosen the active inlet valve and remove the valve from the pump head.
-
Using a pair of tweezers, remove the valve cartridge from the defective active inlet valve.
-
Push the cartridge into the new active inlet valve.
-
Screw the new valve into the pump head. With the 14 mm wrench, turn the nut until it is hand tight.
Position the valve so that the solvent inlet tube connection points towards the front.

-
Using the 14 mm wrench, tighten the nut by turning the valve in its final position (not more than a quarter turn). Do not overtighten the valve.
-
Reconnect the inlet tube to the valve.
-
Reconnect the Active Inlet Valve cable to the connector in the Z-panel.
Run the Leak Rate Test (see Leak Rate Test).
-
NOTE
After an exchange of the valve it may be required to pump several mL of the solvent used in the current application before the flow stabilizes at a pressure ripple as low as it used to be when the system was still working properly.
See Also
base-id: 3836320779
id: 18014402345802763